Monday, February 27, 2012

My New Backyard

I promised to show you pictures of the completed backyard project.  We wanted a woodland mountain look since we do live close to the North Georgia mountains and I think we achieved it.  I still find it hard to believe that it was done in ONE day.  I will definitely recommend this landscaping company. 

Are you ready?    I hope you like it as much as I do. 


This is the entrance to the backyard as you come down the sidewalk from the driveway. 

I can hardly wait to plant some flowers this spring! The best part is, NO GRASS TO CUT!


Saturday, February 25, 2012

Let the Landscaping Begin

Patio  -Completed
Fire pit -Completed (and used for roasting marshmallows several times)
Outdoor Kitchen - Completed  (and used for cooking many times already)
Screened Porch - Painted
Rocking Chairs - Painted (and used for rocking a lot)
Storage room - Organized


A lot of projects have been checked off our "to do" list this winter.  Now it is time for the landscaping.  Spring is around the corner and we wanted to get a jump start on getting the backyard back into shape.  If you remember from an earlier post, this is what our backyard used to look like.


It hasn't been a pretty site after all of the construction was completed.  I did manage to save all of the azaleas, liriope, hostas, and sedums to transplant.  We removed all the stone blocks and donated them to a local high school.  The amazing thing was that the entire landscaping project was completed in ONE DAY!  They did an awesome job.  We still have a few little things that my husband and I will finish, but all of the hard work is done and the best part is that there is no more grass to cut in the backyard.  (Although I will have to replenish the mulch)
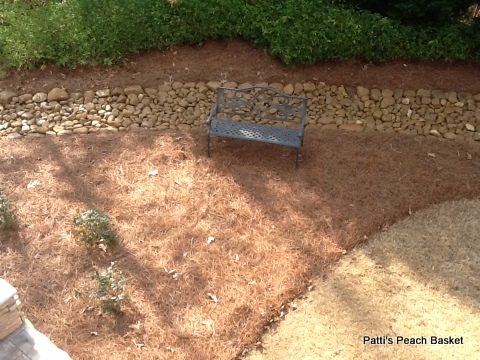
A dry riverbed was dug out.

You can see in this picture that the concrete stacked stone wall was removed.  It opened up the yard a lot.

Laying out the riverbed.

Setting the pattern for the stone walkway.


Check back later for the big reveal!

Sunday, February 19, 2012

The Chairs Are Painted

After much deliberation, we finally decided on a color for our chairs.  I appreciate everyone's comments and recommendations on the color choice.  Most everyone said that we should paint them black and then someone suggested that black would be hot during the summer.  We took all of that into consideration and this was our choice:

We did use a stain instead of paint.
We went with "Slate" in a solid color stain.
Here are the chairs BEFORE.


AFTER
Instead of black, it is more of a dark charcoal.  Instead of brushing them, my husband used a power sprayer which gave them a smooth professional look.  I really like the way they turned out.

Saturday, February 11, 2012

Pinterest Inspired

Are you as addicted to Pinterest as I am? I hate to admit it but whenever I have a free moment, I catch myself logging on just to check to see if anything new has been pinned.  Pinterest is really unique and I have gotten a lot of great ideas like you will see in this next picture.

  Isn't this a great idea for organizing spray bottles under the kitchen sink?  As soon as I saw this, I repinned it to one of my boards, drove to the nearest store and bought a tension rod.  

Here is my version of it:

This is so clever yet so easy.  Why didn't I think of it! I just love organization.


If you haven't checked out Pinterest, you are missing some great ideas.

Saturday, February 4, 2012

Summer Poinsettias

This past Christmas, I had placed a grouping of poinsettias around my tree.  After taking the decorations down, I didn't want to throw them away so I have been keeping them in my sunroom. Poinsettias are actually shrubs that are native to Mexico but will thrive in our area during the summer months. Each year, I cut the red leaves off  (yes, they are leaves, not flowers) and nurture them until spring and then I plant them in my yard.  They will grow into a beautiful shrub.  

What most people think are flowers, are actually leaves. The flowers are the little yellow things in the center.  Commercial growers will keep them in total darkness for about 12 hours a day beginning around October  This way, they can't make chlorophyll and will lose the green color in the leaves.  Each December I incorporate this as a lesson in my science class.  The students are always amazed when I tell them that the bright colors were always there but were masked by the green chlorophyll 

As you can see, there were already some new leaves growing.  They will need sunlight now so they can make chlorophyll so I will keep them in indirect light in my sunroom for a few months. When you cut them, there will be a milky sap and it can irritate your skin so wash your hands immediately.
Here is a picture of one that I grew in my yard last summer.  It thrived in our hot humid weather but it won't survive after the first frost.  
 
This is a picture that I took right after I transplanted it outside last summer and you see from the previous picture  that it grew a lot over the summer.
Another good thing about this plant, the deer won't touch it!  I'll keep you updated on how they are growing.  I am so ready for spring!